35 Easy Afro Hairstyles for Beginners
Disclosure: Some of the links in this post are affiliate links. This means if you click on the link and purchase an item, I will receive an affiliate commission at no extra cost to you.
If you are a beginner in your Afro hair journey and you don’t know Afro hairstyles or you find it difficult getting easy natural hairstyles, this post was written for you.
Starting out with natural Afro hair can feel overwhelming, especially when you see complicated styles online and assume that’s where you have to begin.
The truth is, there are so many beautiful styles that don’t require any special skill, a lot of time, or expensive products to achieve. You just need to know where to look and what to start with.
A lot of beginners make the mistake of jumping into complex styles before they even understand their hair texture or have a basic routine in place.
That usually leads to frustration, breakage, and giving up before the journey even really begins. Starting simple is not a step backward, it’s actually the smartest way to build confidence and learn what your hair responds to.
Every style in this guide is beginner friendly, meaning you can achieve it at home with basic tools and a little patience. Some of them take less than five minutes.
Others take a bit more time but are still completely manageable without professional help. Work through this list at your own pace and you’ll be surprised at how quickly your styling confidence grows.
If you haven’t read The Ultimate Beginner’s Guide to Afro Hair Care yet, start there before diving into styles. Understanding your hair first makes every style on this list easier to achieve.
35 Easy Afro Hairstyles Every Beginner Can Try Today
Simple Puff and Bun Styles
Puffs and buns are the best place to start as a beginner because they require almost no technique and work on most Afro hair lengths and textures.
You only need a soft hair tie and a little moisture to pull most of these off, which makes them perfect for days when you’re still figuring out your routine.
These styles also put very little stress on your hair, which is important when your hair is still adjusting to a new natural care routine.
Once you master puffs and buns, every other style on this list becomes easier because you already understand how to handle and gather your hair without causing breakage.
Read this next: 25 Afro Puff Styles You Will Like
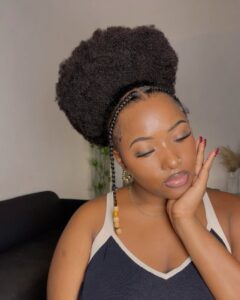
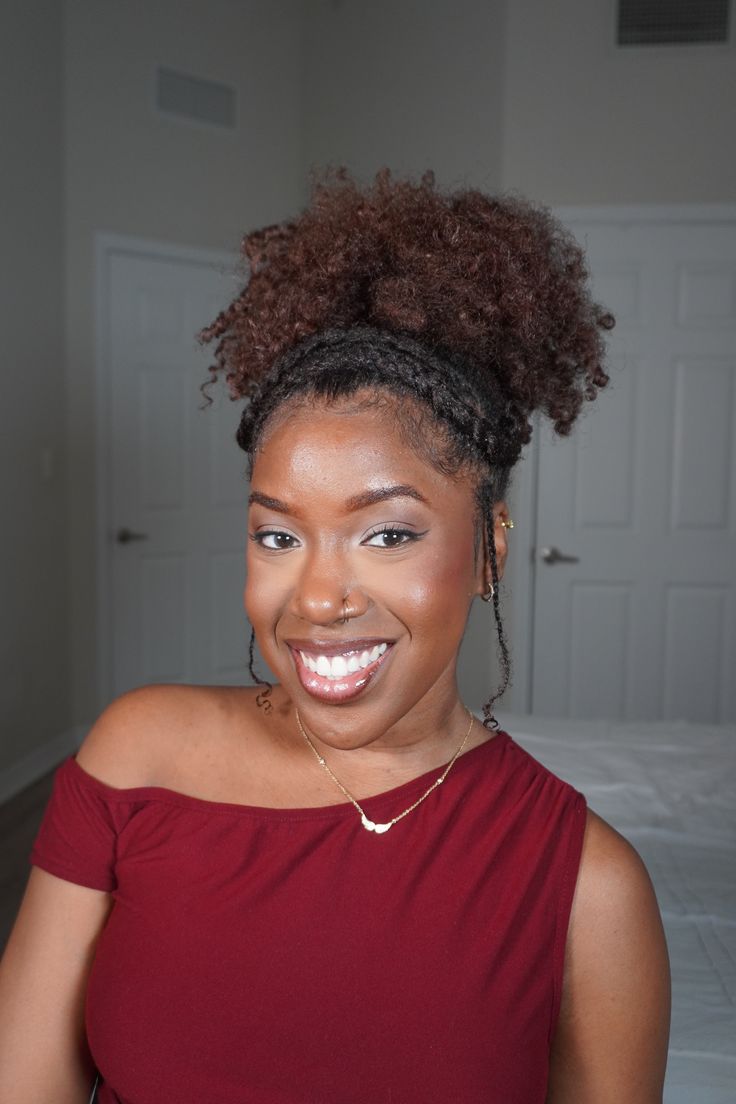
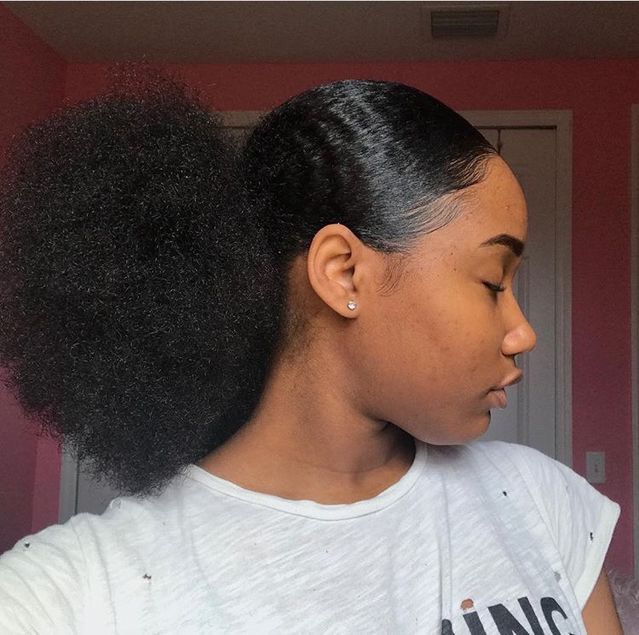
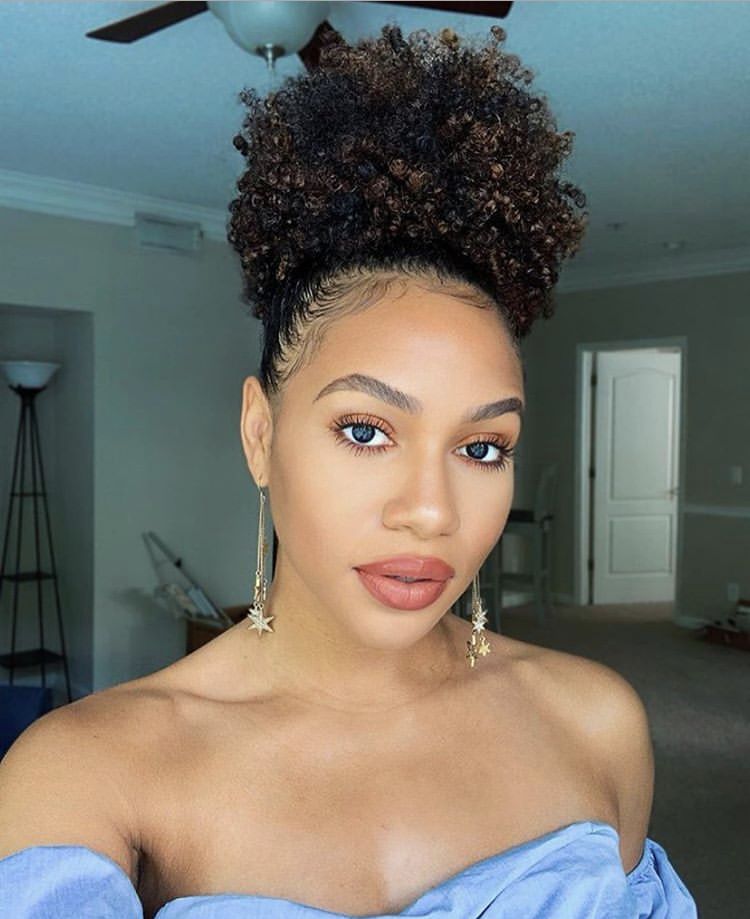
1. Classic Afro Puff
Gather all your hair to the top of your head and secure it with a soft satin covered hair tie to create a full, round puff.
This is the most beginner friendly style of all because it requires no tools, no products beyond a moisturizer, and no technical skill whatsoever.
Make sure your hair is damp and moisturized before putting it up so the puff looks full and healthy rather than dry and dull. It works on short, medium, and long Afro hair and suits every face shape without much adjustment needed.
2. Low Puff
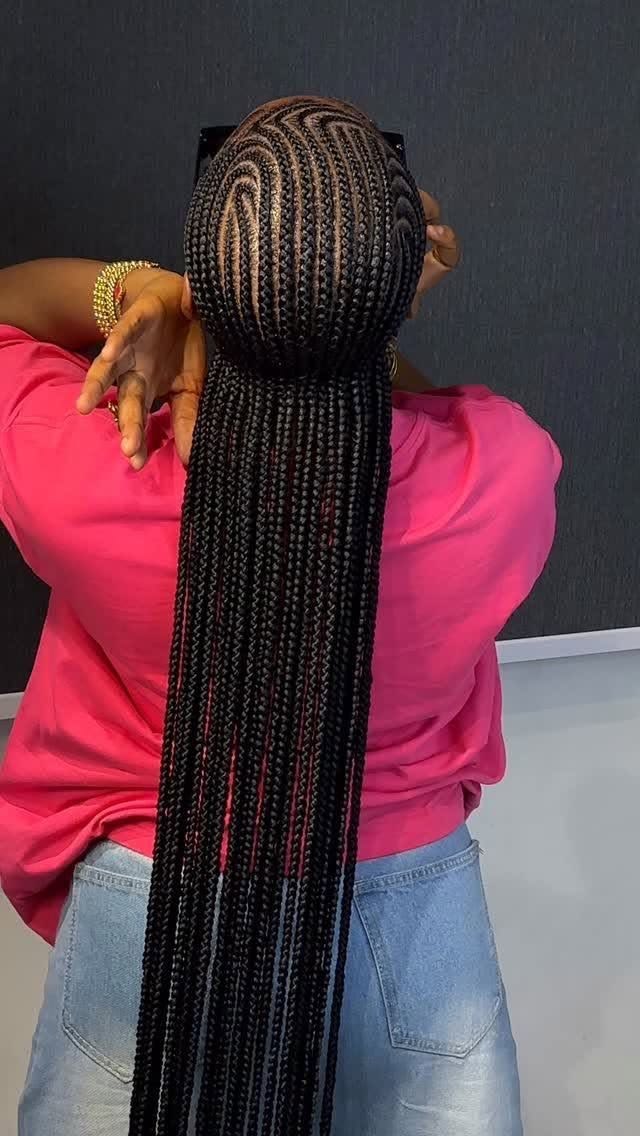
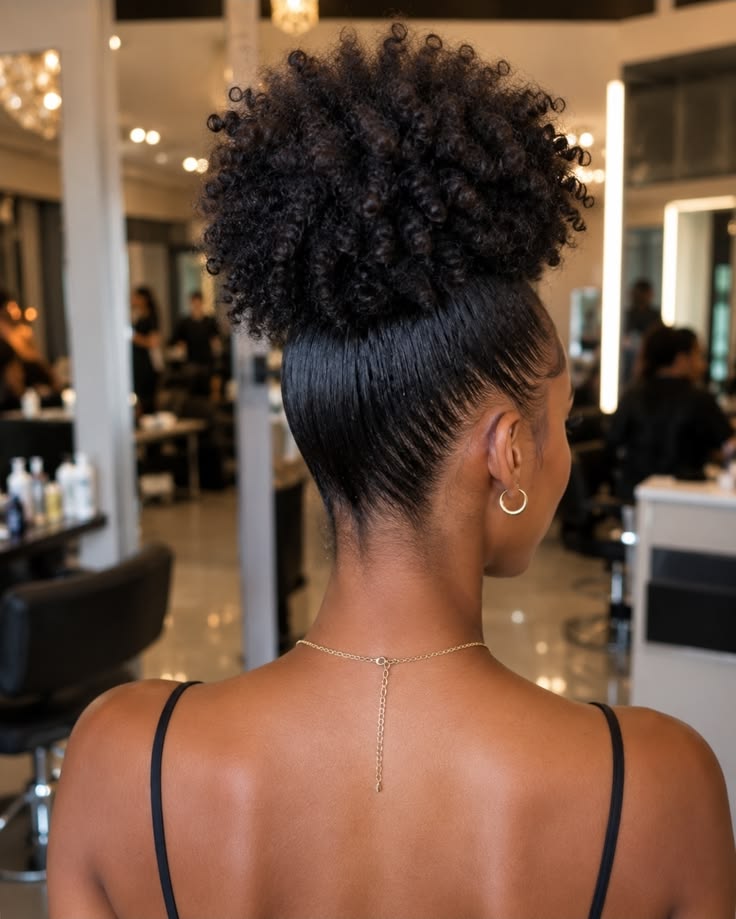
Same technique as the high puff but positioned at the nape of your neck instead of the top of your head for a softer, more relaxed look.
It suits rounder face shapes particularly well and gives a slightly more polished appearance than a high puff without any extra effort.
This is a great option for days when you want to look put together quickly without spending any real time in front of the mirror. A light edge gel along your hairline takes this style from simple to very neat in under a minute.
3. High Bun
Gather all your hair to the top of your head and twist or tuck it into a secure bun held in place with a hair tie or bobby pins.
It’s one of the fastest styles you can do and works especially well when your hair is already moisturized and detangled from the night before.
A high bun keeps your hair completely out of your face and reduces daily manipulation, which helps your hair retain length over time. You can dress it up with a headband or scarf wrapped around the base for a more intentional look.
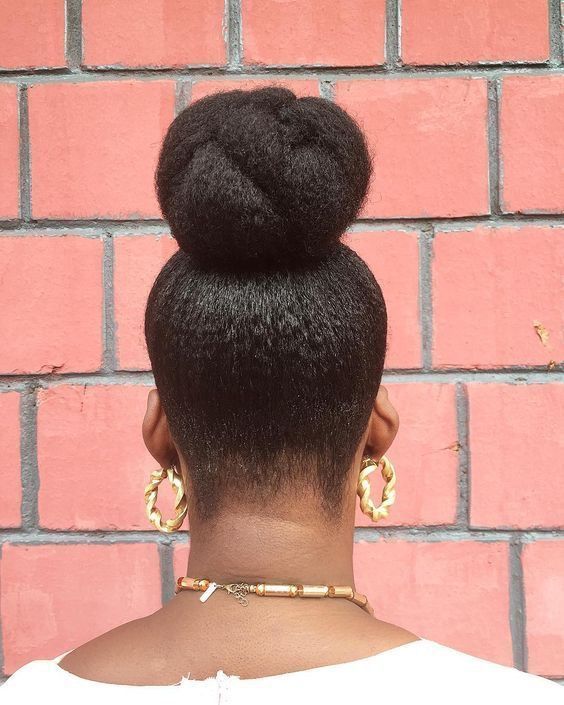
4. Low Bun
Position your bun at the nape of your neck instead of the crown for a cleaner, more elegant everyday look that suits work, school, and casual outings.
A low bun feels more intentional than a high bun and suits people who want something simple but polished without spending more than two minutes styling.
Use a few bobby pins to secure any loose ends and apply edge control along your hairline for a neat finish. This style also works well as a protective option because it keeps your ends tucked away from friction and daily wear.
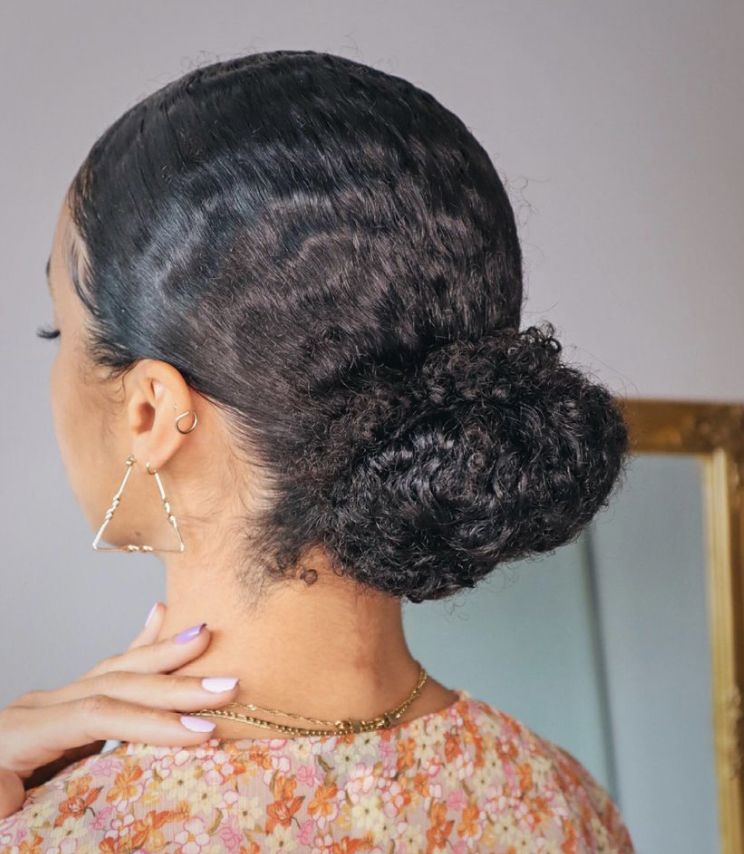
5. Pineapple
Gather all your hair loosely at the very top of your head without flattening or disturbing the curl pattern and secure it with a very loose hair tie.
The pineapple is one of the most practical beginner styles because it works both as an overnight protective style and as a casual daytime look the next morning.
It preserves your curl definition while you sleep so you wake up with hair that still looks styled rather than flat and matted. Use a silk or satin scarf over the pineapple at night for even better moisture retention and curl preservation.
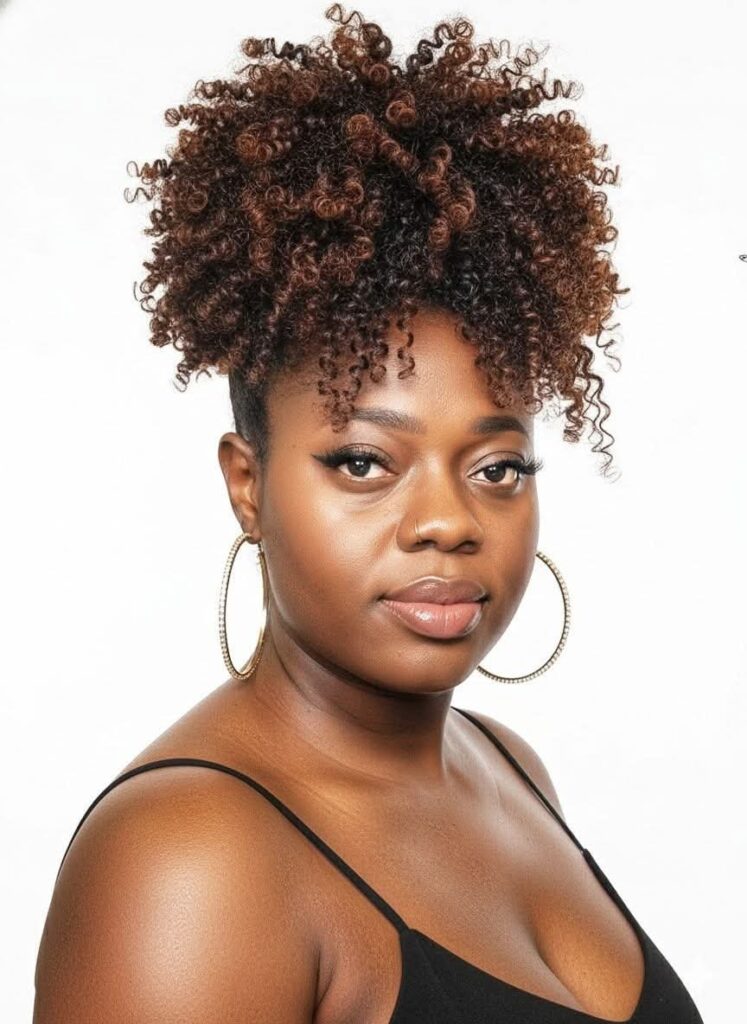
6. Half Up Half Down
Section the top half of your hair and gather it into a small puff or bun while leaving the bottom half completely loose and natural.
This style is perfect for beginners who want to show off their natural curl pattern while still having some of their hair neat and out of their face at the same time.
It requires no special skill, just the ability to section your hair and secure a small puff at the top. Moisturize your hair well before styling so the loose bottom section looks defined and healthy rather than dry and frizzy.
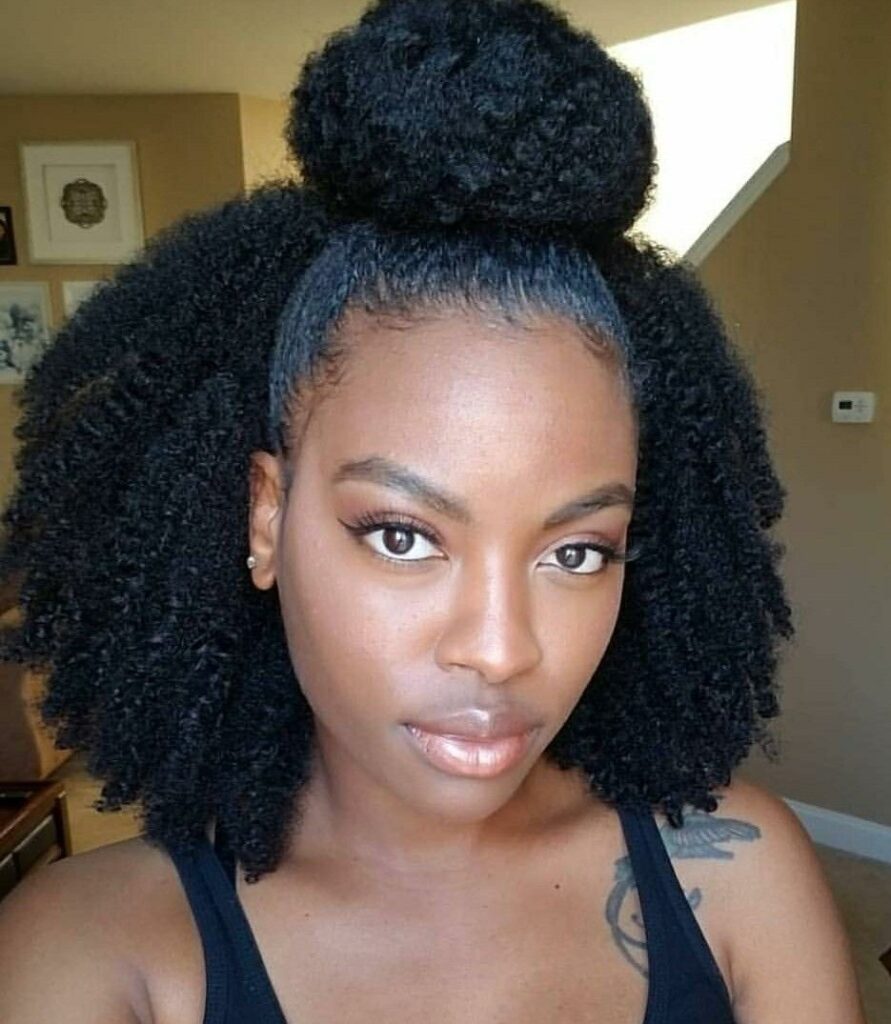
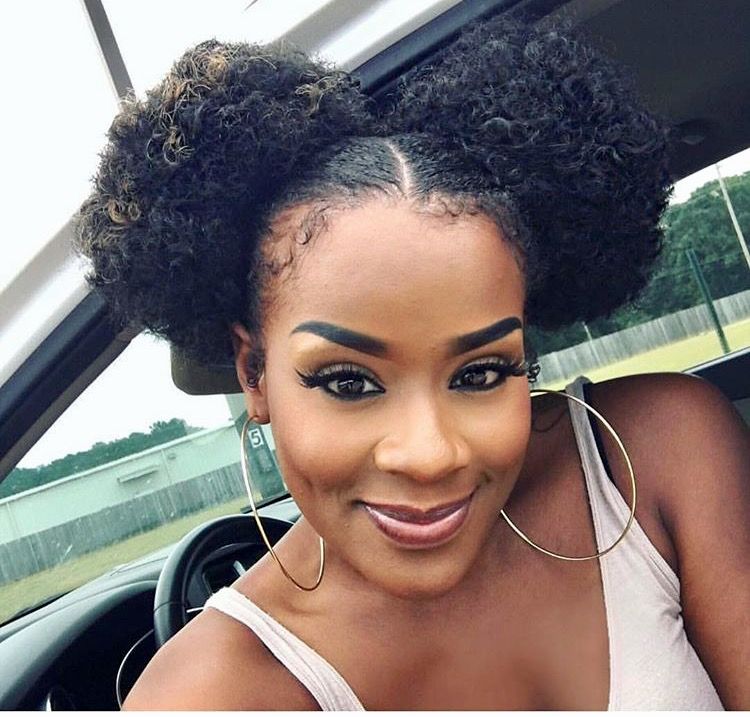
7. Space Buns
Divide your hair evenly down the middle and create one bun on each side of the top of your head, securing each with a hair tie.
Space buns are fun, youthful, and very beginner friendly because the technique is exactly the same as a regular bun just done twice.
They work on short, medium, and longer Afro hair and take less than five minutes to put together once your hair is detangled. Add small decorative clips or pins to each bun to give the style a more personal and finished touch.
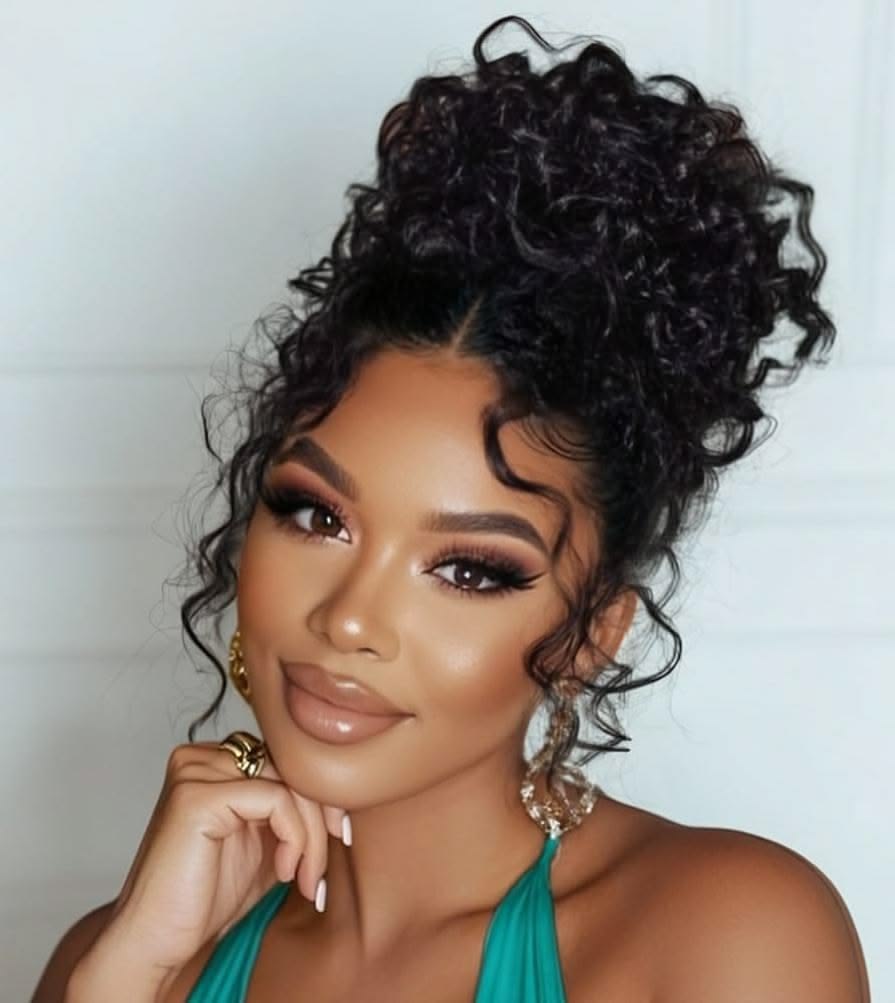
8. Messy Bun
Create a regular high or low bun but intentionally pull a few sections loose at your temples and nape before securing it so it looks effortless and relaxed rather than stiff and perfect.
The beauty of the messy bun for Afro hair is that the natural texture of the hair makes it look even better when it’s slightly undone rather than fighting against the grain.
This style suits beginners perfectly because imperfection is actually part of the look, so there is very little pressure to get it exactly right.
It’s one of the best styles for days when your hair isn’t fully cooperating but you still need to look presentable quickly.
Twist and Braid Styles for Beginners
Twists and braids are slightly more involved than puffs and buns but are still very manageable for beginners, especially when you start with larger sections.
The key is to always work on moisturized, detangled hair and to be patient with yourself in the early stages while your hands are still learning the technique.
Starting with two or four large sections rather than many small ones makes the process much faster and less intimidating.
Over time your sectioning will get neater and your twists will get tighter, but even imperfect twists look good on Afro hair and still serve as a protective style.
Don’t miss this: Everything You Need to Know About Protective Styling
9. Two Strand Twists
Divide your hair into sections and twist two strands of hair around each other from root to tip until you reach the end of the strand.
This is the most beginner friendly twist style because the technique is simple, forgiving, and looks neat even when you’re still learning.
Start with larger sections if you’re new to twisting because they are much easier to handle and still give a beautiful result.
Apply a cream or butter to each section before twisting to add moisture and help the twists hold their shape longer without unraveling.
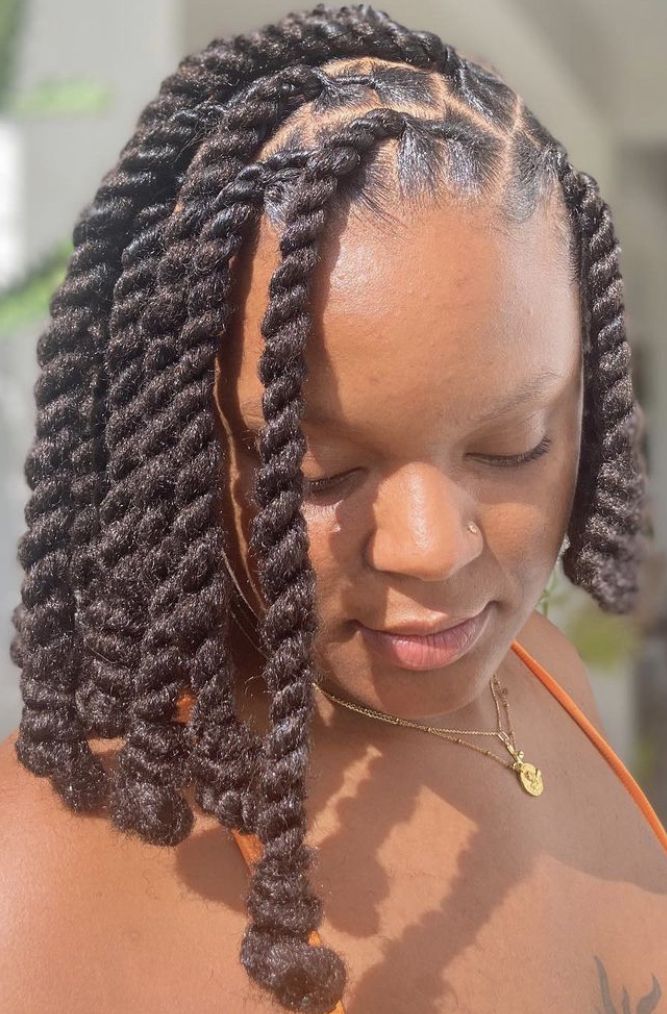
10. Chunky Twists
Same technique as regular two strand twists but done with very large sections of hair so you end up with fewer, thicker twists all over your head.
Chunky twists are ideal for complete beginners because the large sections are much easier to handle and the whole style can be done in under an hour even with no experience.
They look bold and intentional and also create a beautiful voluminous twist out when you unravel them a day or two later. This is a great style to practice your twisting technique on before moving to smaller, more detailed sections.
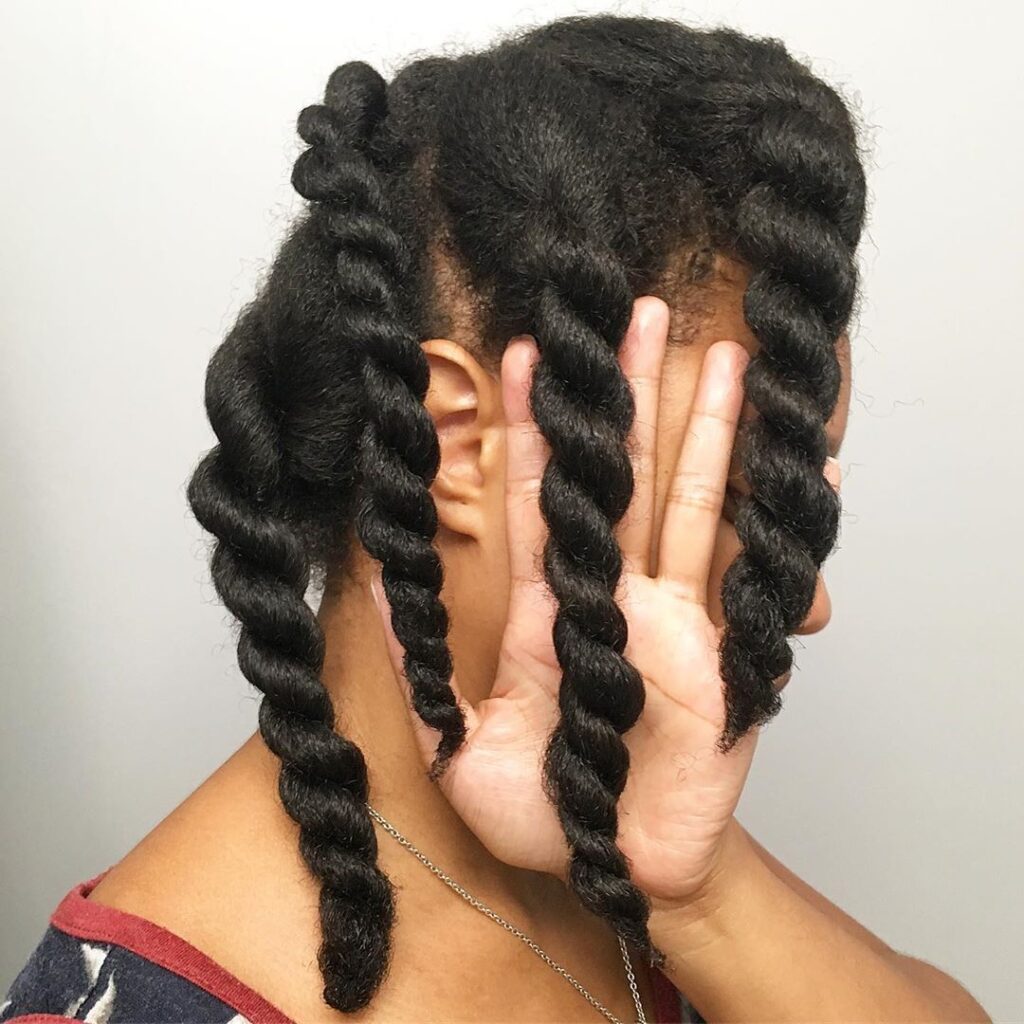
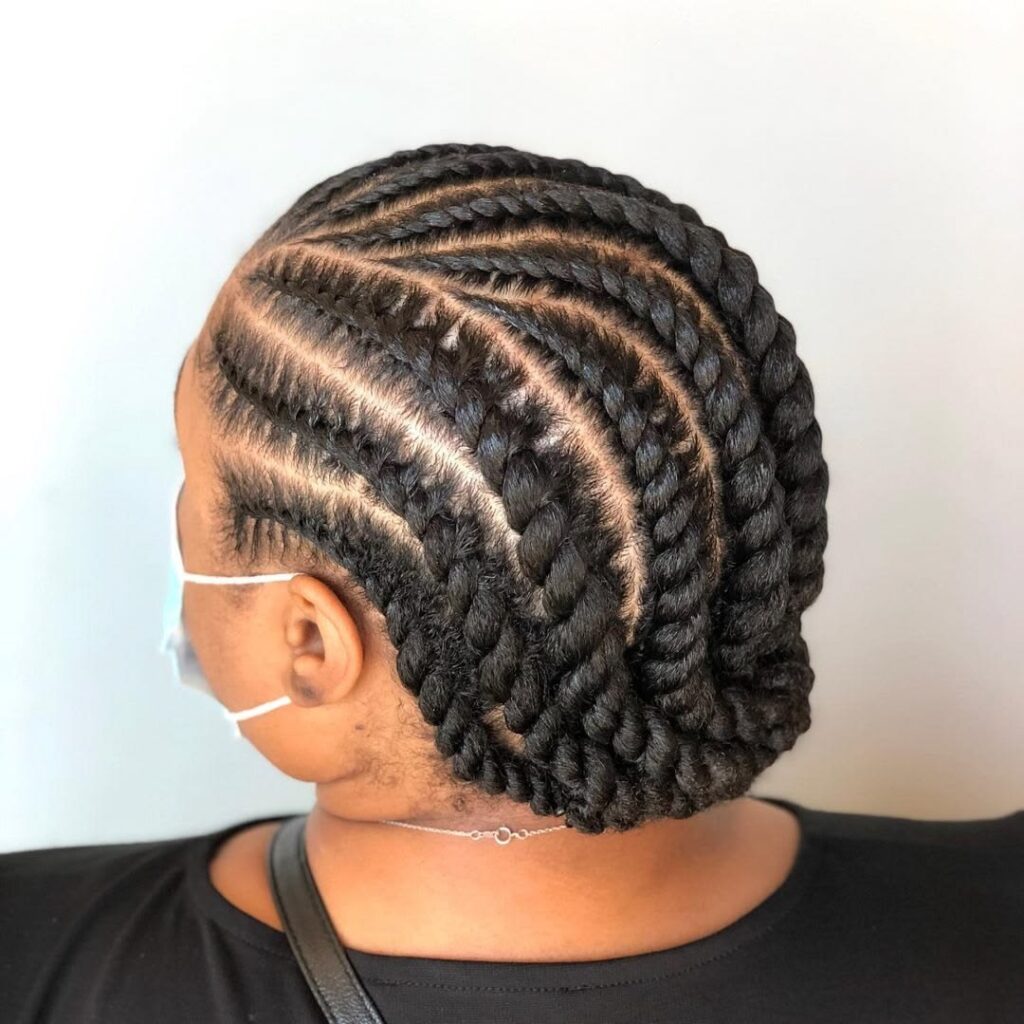
11. Flat Twists
Part your hair into sections and instead of twisting the hair outward, twist it flat along the scalp going in one direction from front to back or in a curved pattern.
Flat twists lie close to the scalp similar to cornrows but use a two strand twist technique instead of a three strand braid, making them slightly easier for beginners to learn.
They look neat and polished from the front and create a beautiful flat twist out when you unravel them after they’ve dried completely.
Start by doing just two flat twists going straight back on each side until you get comfortable with the technique before trying more complex patterns.
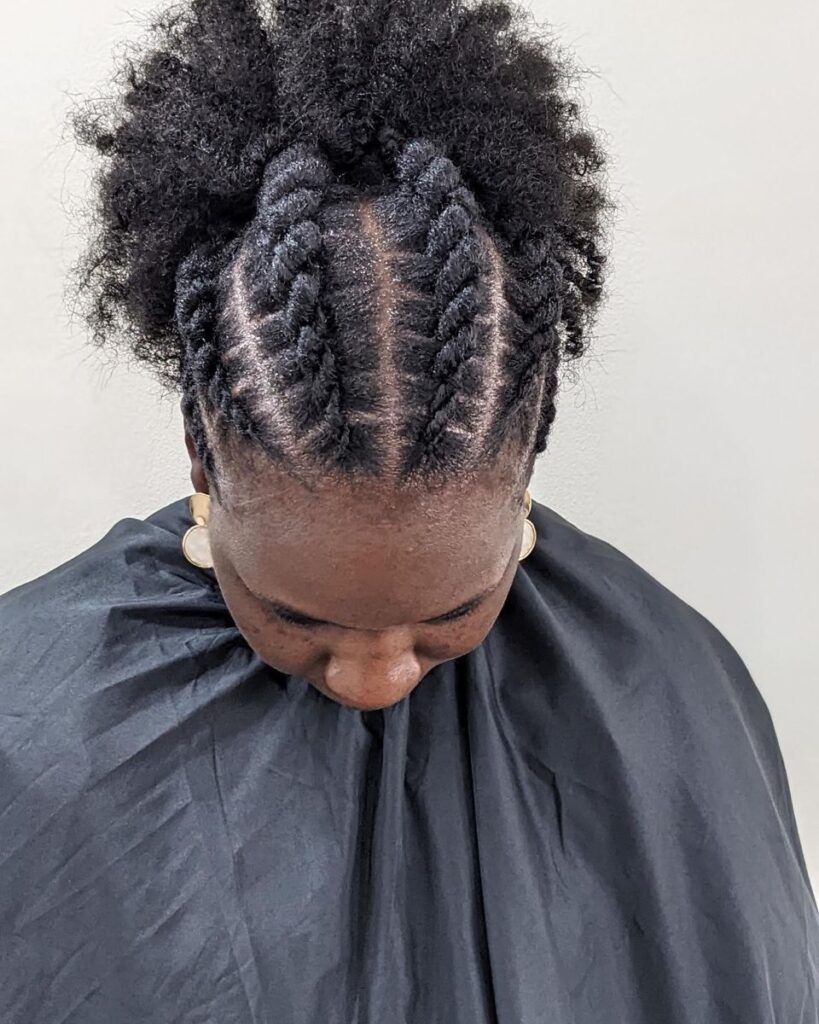
12. Flat Twist and Puff
Create two flat twists going along the sides or front of your head and gather the rest of your untwisted hair into a puff at the back or top.
This style combines a simple technique with a simple style to create something that looks much more put together than either element would on its own.
It’s a great beginner style because even if your flat twists aren’t perfectly neat, the overall look still comes together well.
This is also a good protective option because the puff keeps your ends gathered while the flat twists protect your edges from constant manipulation.
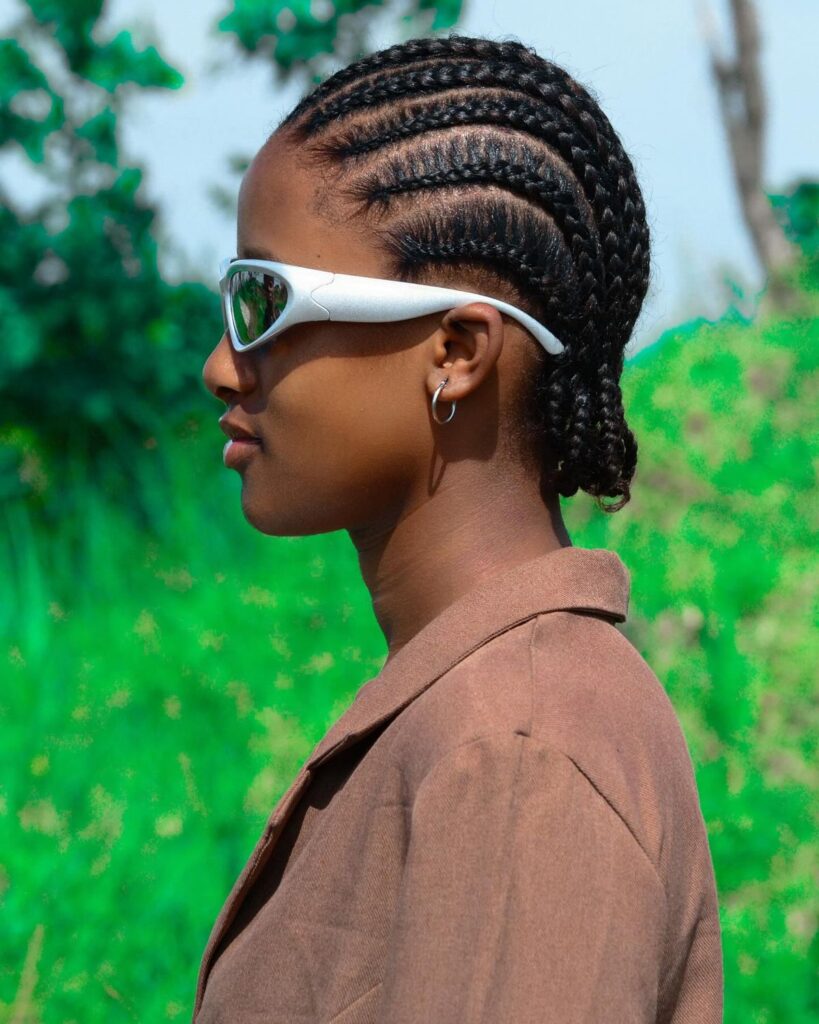
13. Simple Cornrows
Part your hair into two to four large sections and braid each section flat along the scalp going straight back from your hairline to your nape.
Cornrows are slightly more technical than twists but are still achievable for beginners who take their time and practice on large sections first.
Keeping the sections big and the pattern simple, like four rows going straight back, reduces the difficulty significantly and still gives a very clean and protective result.
Watch a few beginner cornrow tutorials before attempting your first time and practice on a doll head or a friend before doing your own hair if possible.
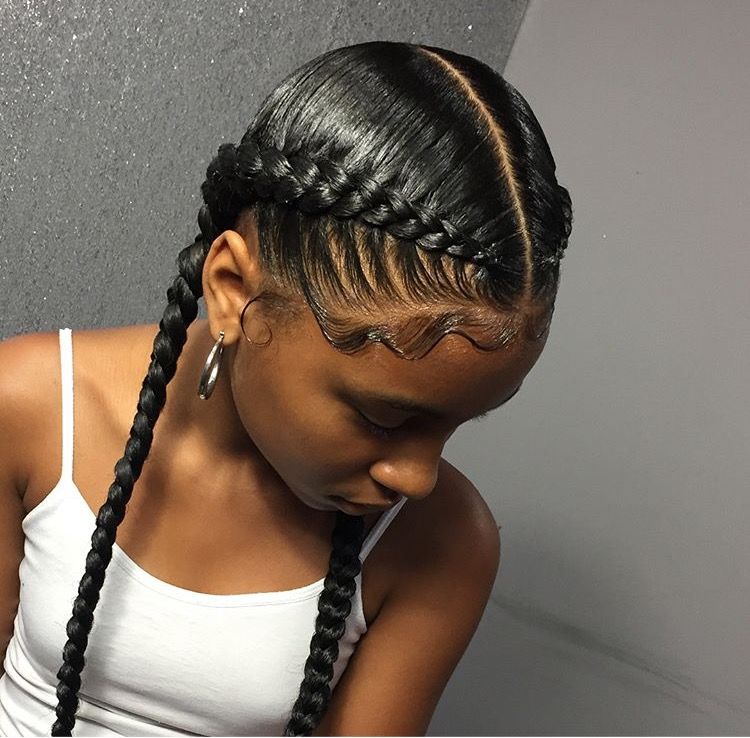
14. Two Cornrows
Divide your hair down the middle and cornrow each half into one large cornrow going straight back on each side.
Two cornrows are the simplest cornrow style possible and are a perfect introduction to the technique because you only have two sections to manage at once.
They look clean, neat, and protective and work well for active days when you need your hair completely secured and out of the way. Two cornrows are also a good base style to wear before installing a wig or adding extensions on top.
15. Braid Out
Install two strand twists or regular braids all over your damp, moisturized hair, let them dry completely overnight, then carefully unravel each one in the morning for a defined, stretched wave pattern.
A braid out is one of the best beginner styles for getting a defined look without any heat because the braids or twists do all the work while you sleep.
The key is making sure every braid or twist is fully dry before unraveling, since opening them too early leads to frizz and loss of definition.
Start with larger braids or twists for a looser, fuller wave pattern and work toward smaller ones as you get more comfortable with the process.
You’ll thank yourself later: Daily Habits That Keep Afro Hair Healthy
Wash and Go Styles for Beginners
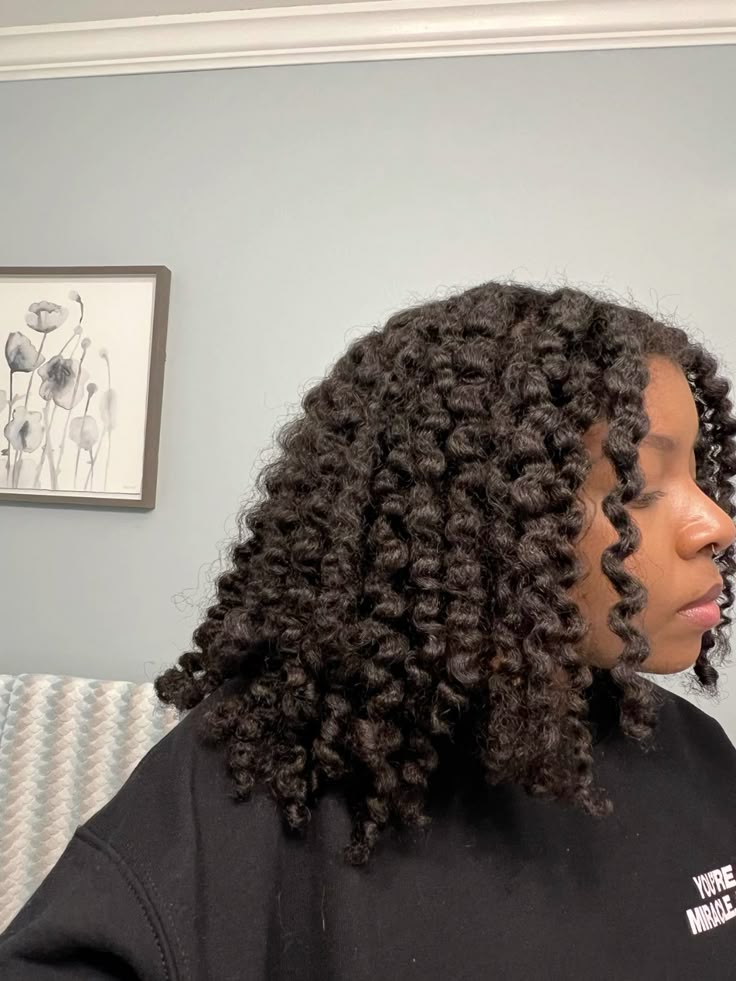
Wash and go styles celebrate your hair’s natural curl pattern without any braiding, twisting, or complex technique.
They are perfect for beginners because the only skill required is learning how to apply products correctly to damp hair and then leaving the hair completely alone as it dries.
The biggest mistake beginners make with wash and go styles is touching their hair too much while it’s still drying, which disturbs the curl pattern and leads to frizz.
Give your hair time to fully dry before assessing the result and remember that the more you practice, the better you will understand which products give your specific curl pattern the best definition.
Keep this handy: 27 Wash and Go Hairstyles That Actually Last
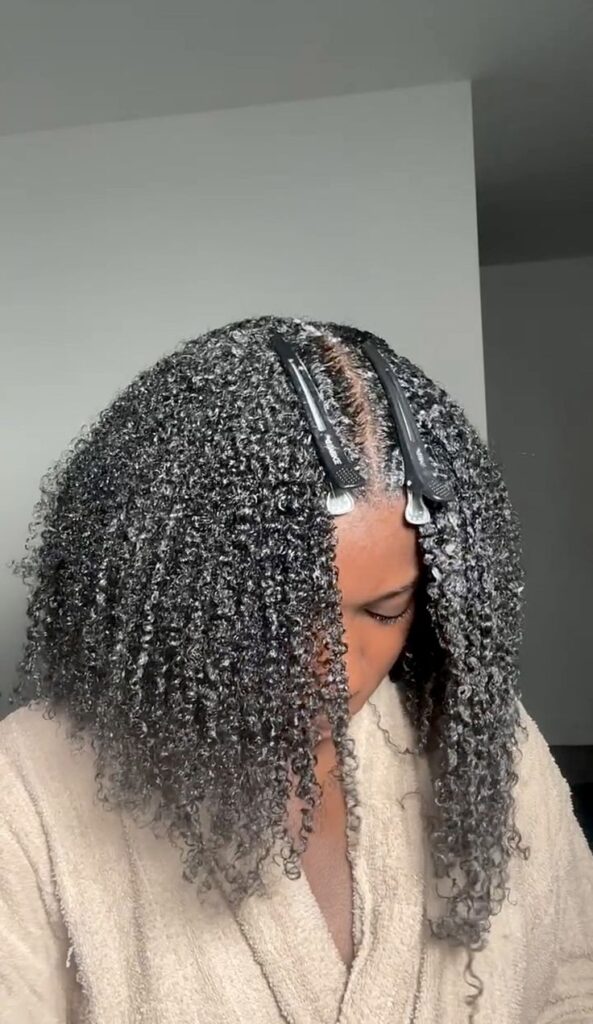
16. Classic Wash and Go
After washing your hair, apply a leave in conditioner followed by a curl defining cream to damp hair section by section, then leave your hair completely alone to air dry without touching it.
This is the most basic wash and go style and requires no tools beyond a spray bottle and your hands to apply products. The less you manipulate your hair while it dries, the more defined and frizz free the result will be once it’s fully dry.
This style works on all Afro curl types but tends to give the most visible definition on 4A and looser 4B hair types.
17. Gel Wash and Go
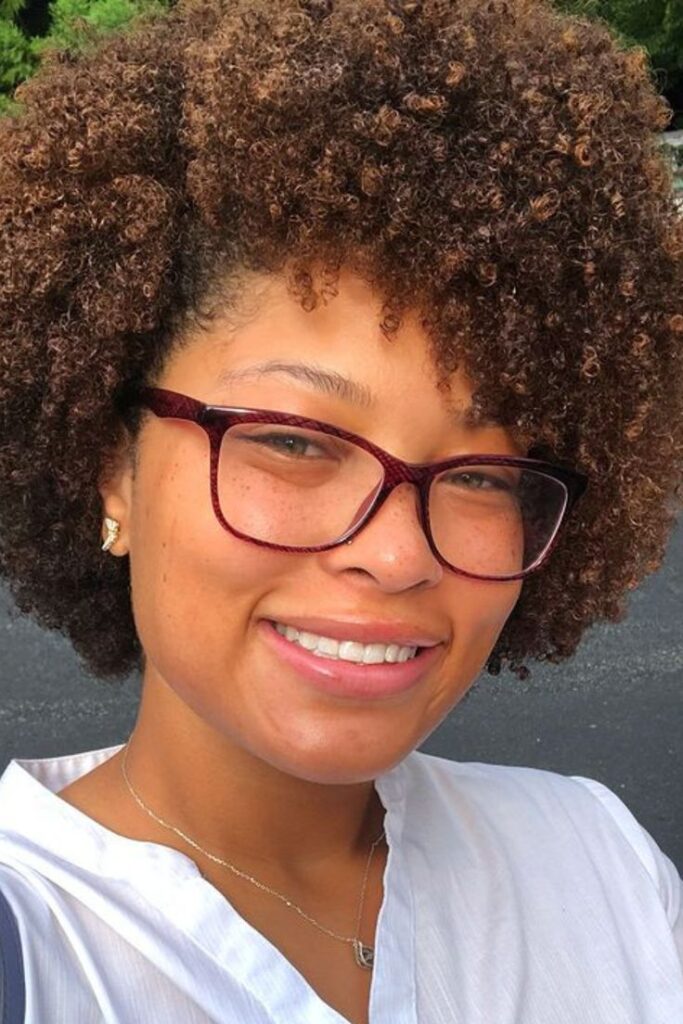
Apply your leave in conditioner as usual and then add a layer of strong hold gel on top to lock in more definition and help your curls hold their shape throughout the day.
The gel forms a cast around each curl as it dries which keeps the pattern intact even in humid conditions that would normally cause frizz.
Once fully dry, scrunch the cast gently between your palms to break it up and reveal soft, defined curls underneath without disturbing the pattern.
This method works especially well for 4B and 4C hair types that struggle to hold definition with cream products alone.
18. Wash and Go With Headband
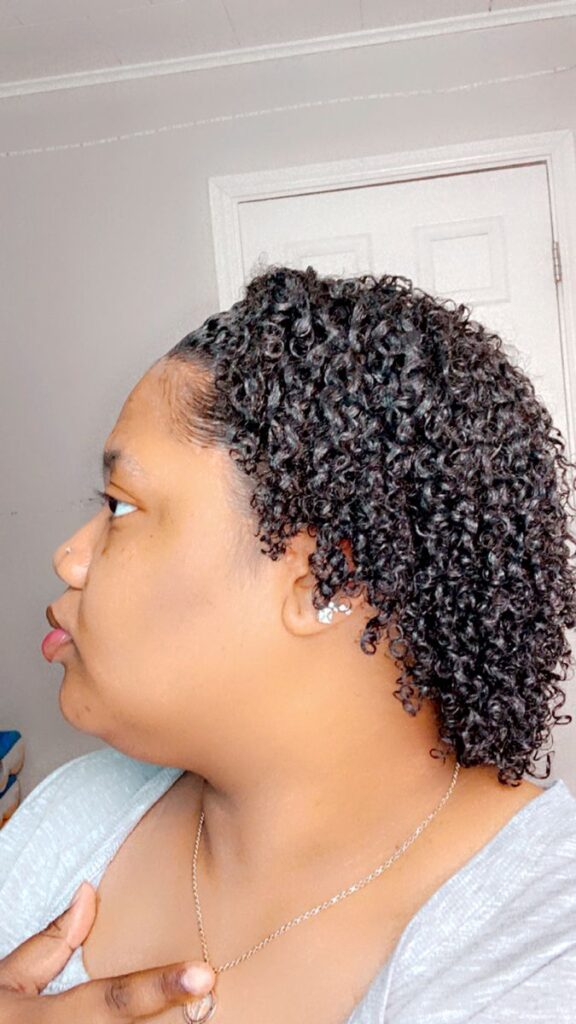
Complete a regular wash and go with your preferred products, then pull the very front section of your hair back with a wide headband once you’re done applying products.
The headband frames your face neatly and gives the style a more finished, intentional look without adding any extra steps or products to your routine.
Choose a wide satin lined headband to protect your edges and prevent the headband from causing breakage along your hairline over time.
This is one of the easiest ways to make a basic wash and go look like you put in significantly more effort than you actually did.
19. Defined Wash and Go on Stretched Hair
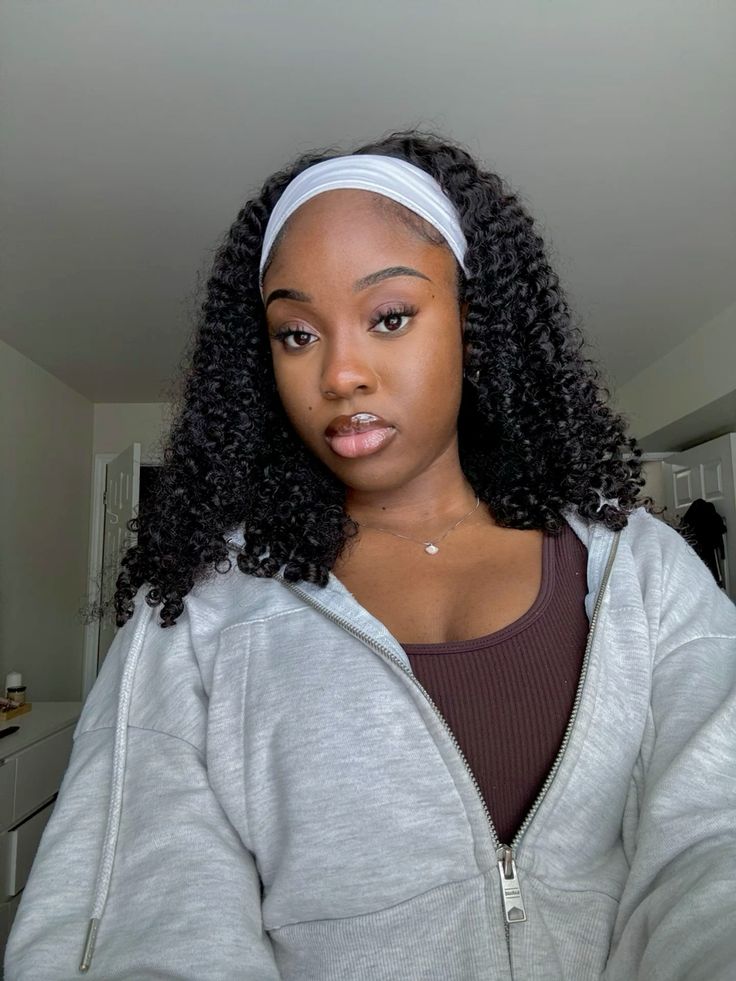
Stretch your hair first using braids or twists, then unravel them and apply your wash and go products to the stretched hair before allowing it to shrink back into its natural curl pattern as it dries.
Stretching before applying products helps the products distribute more evenly throughout the hair and often gives a more defined result on tighter curl patterns that struggle with product distribution when hair is fully shrunk.
This method takes more time than a regular wash and go but gives a noticeably fuller and more defined result especially for 4C hair types.
It’s a great technique to master once you’ve tried a few basic wash and go styles and are ready to get more out of your natural curl pattern.
Protective Styles for Beginners
Protective styles are styles that tuck your ends away and reduce the amount of daily manipulation your hair goes through, which helps it retain length and stay healthier over time.
As a beginner, getting into the habit of protective styling is one of the most important things you can do for your hair growth journey.
You don’t need to be in a protective style every single day, but aiming for at least two weeks out of every month in a protective style makes a noticeable difference in how much length you retain over time.
Always make sure your hair is clean and well moisturized before installing any protective style and continue to moisturize your scalp while the style is in.
Readers also loved this: How to Build the Perfect Afro Hair Care Routine
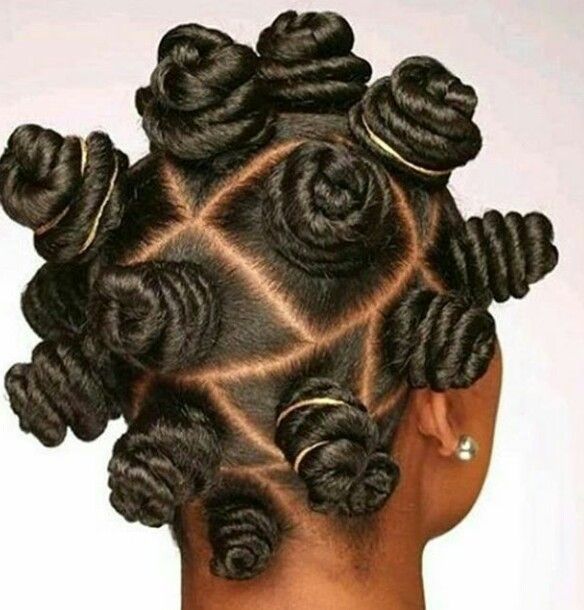
20. Bantu Knots
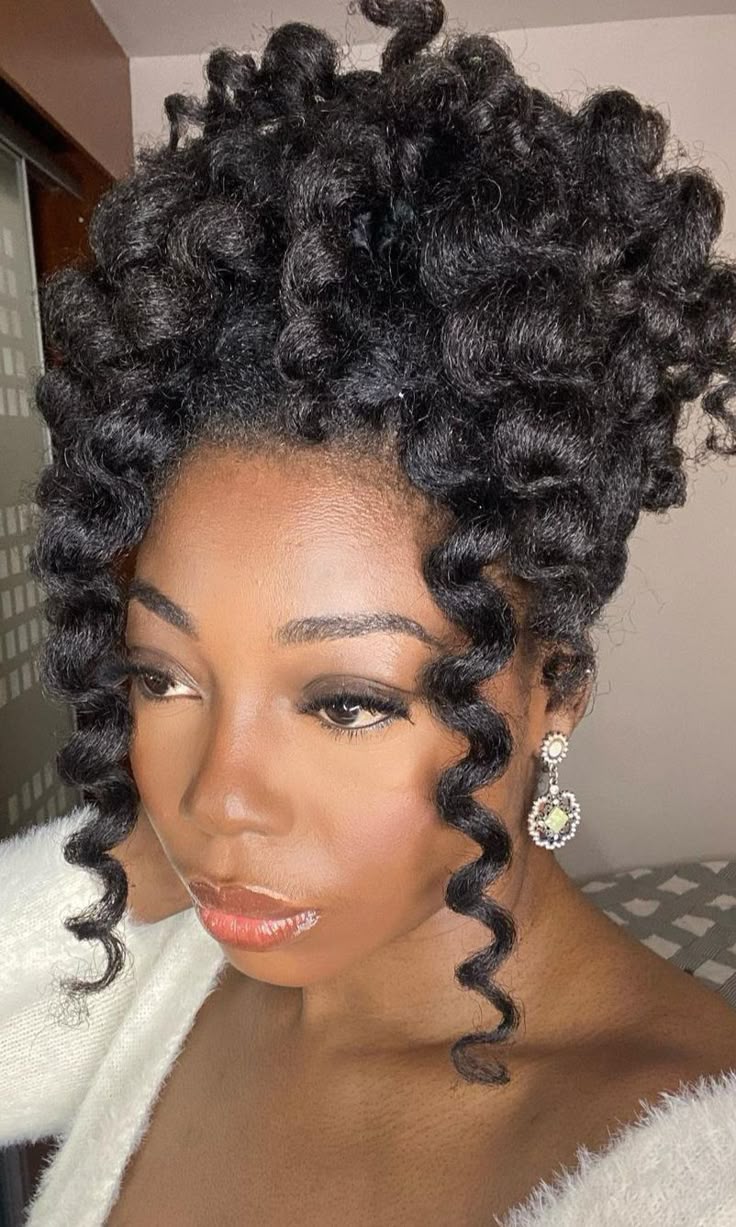
Divide your hair into sections, twist each section tightly, then coil it around itself flat against your scalp and tuck the end underneath to secure it in place without any pins.
Bantu knots are a beautiful beginner protective style because the technique is simple, requires no tools, and creates a stunning sculptural look that also doubles as a styling method when you unravel them later.
Start with larger sections to make the coiling easier and work toward smaller, more detailed knots as you become more comfortable with the process.
Always install Bantu knots on damp, well moisturized hair so the coils sit smoothly and the style holds its shape without feeling stiff or dry.
21. Bantu Knot Out
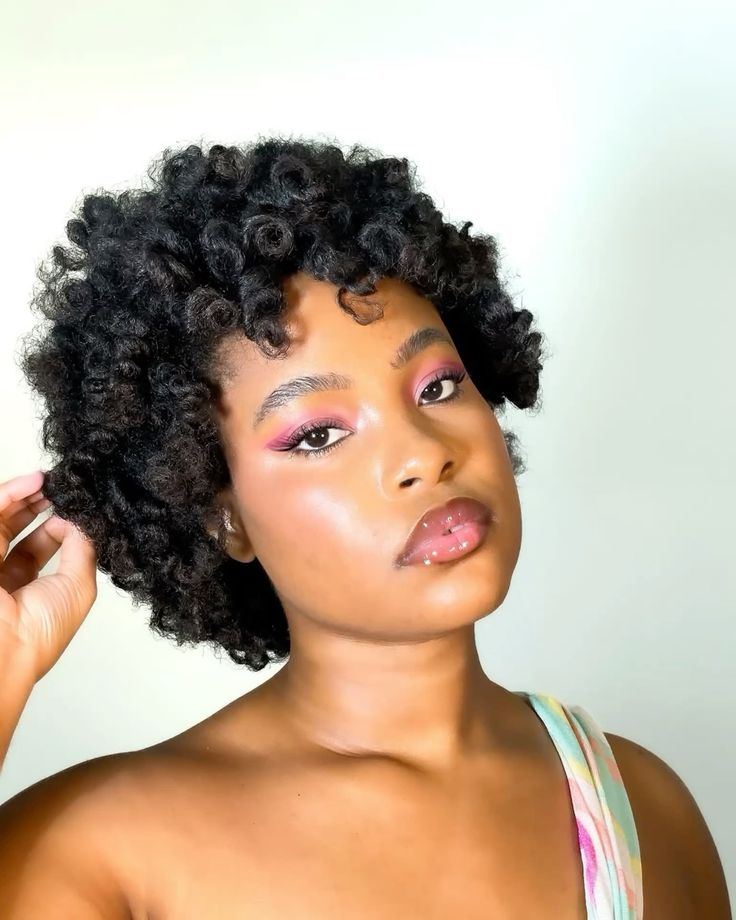
Install Bantu knots on damp hair as described above, let them dry completely overnight under a satin scarf or bonnet, then carefully unravel each one in the morning for a beautiful defined coil pattern.
The Bantu knot out is one of the most rewarding beginner styles because the result looks like you spent hours on a complex style when really you just slept on it.
Use a light oil on your fingertips when unraveling each knot to add shine and prevent frizz from forming as you separate the coils.
The smaller the Bantu knot going in, the tighter and more defined the coil will be when you unravel it, so adjust the section size based on the result you want.
22. Simple Box Braids With Large Sections
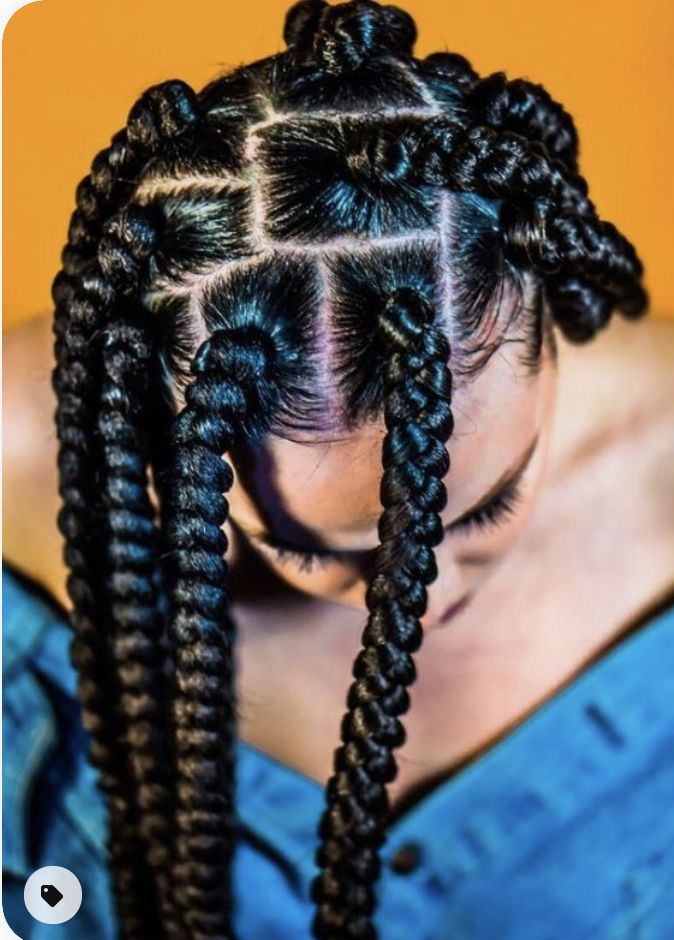
Section your hair into large square parts and braid each section from root to tip using either your natural hair alone or with a small amount of extension hair added for length and thickness.
Large box braids are a great beginner braid style because the big sections are much easier to manage and install than smaller, more detailed braids.
They look bold and protective and can last two to four weeks with proper scalp care and moisturizing in between washes.
If you’re installing box braids for the first time, watch a beginner tutorial first and take breaks to avoid rushing and creating uneven or messy results.
23. Feed In Braids
Ask a braider to create cornrows where the extension hair is gradually fed in as the braid progresses rather than knotted heavily at the root, giving a more natural and comfortable result.
Feed in braids are gentler on your edges and scalp than traditional cornrows with extensions and look far more natural because the braid builds gradually in thickness from thin to full.
As a beginner you don’t need to know how to install feed in braids yourself, just knowing what to ask for when you visit a salon is enough to protect your hair and edges significantly.
Make sure whoever is braiding your hair understands feed in technique and ask them to keep the tension comfortable rather than tight along your hairline.
Read this next: Feed-In Braids That Protect Your Edges
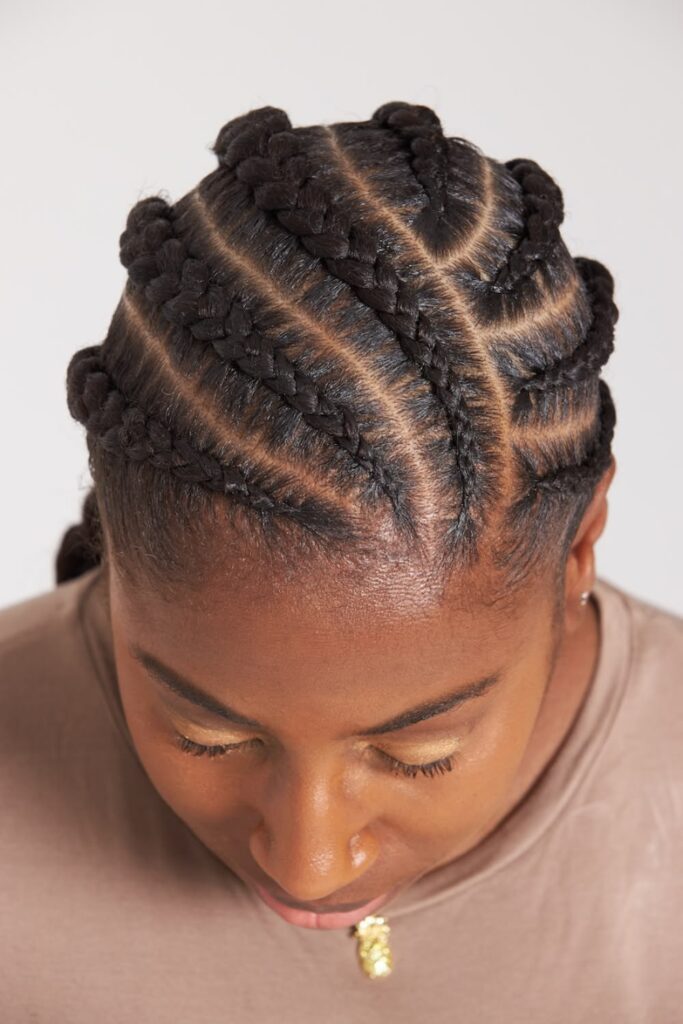
24. Simple Crochet Style
Purchase pre twisted or pre looped crochet hair from a beauty supply store and use a crochet needle to loop small sections of the extension hair onto your own cornrowed natural hair underneath.
Crochet styles are one of the easiest ways for beginners to achieve a full, beautiful protective style without spending hours braiding because the cornrow base underneath is simple and the crochet hair does most of the visual work.
They come in twist, braid, and curl styles so you can choose whichever look appeals to you most before purchasing the hair.
Always moisturize and care for your natural hair underneath the crochet style regularly, even though the style itself covers your hair completely.
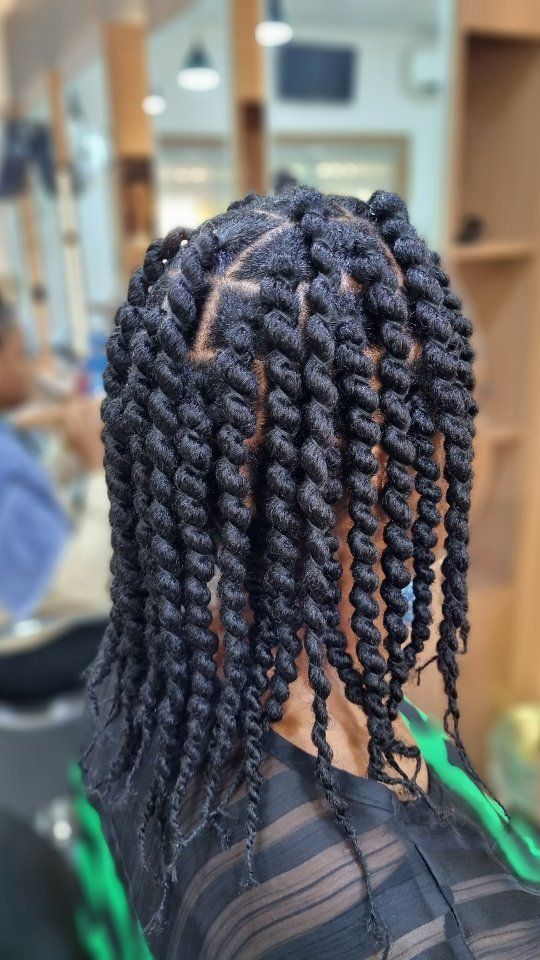
25. Knotless Braids With Large Sections
Ask your braider to install knotless braids, which means the extension hair is fed in gradually at the root instead of knotted tightly, using large sections so the installation is more comfortable and faster.
Knotless braids sit much more naturally on the scalp, cause less tension on your edges, and look more realistic than traditional box braids because there is no visible knot at the root of each braid.
As a beginner you benefit from knotless braids because they are significantly more comfortable to wear and less likely to cause the scalp tenderness and edge tension that beginners are not always used to managing.
You’ll want to read this: Knotless Braids: Complete Beginners Guide
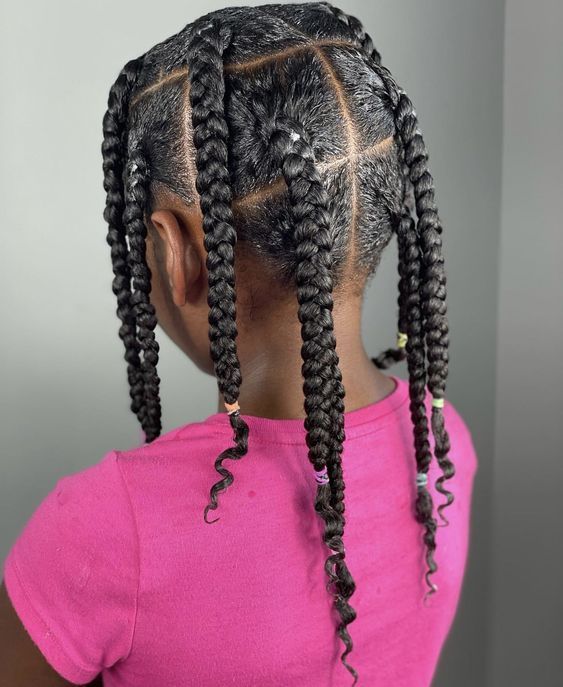
Heat Free Styling for Beginners
Heat free styles are styles that create definition, stretch, or volume in your hair without using any heat tools like blow dryers, flat irons, or curling wands.
Learning to style your hair without heat is one of the most important skills you can build as a beginner because it protects your hair from heat damage while you’re still in the early stages of building its strength and health.
Most heat free styles work by using the natural texture of your hair combined with products and time to create the result, which means they are very forgiving even if your technique isn’t perfect yet.
Start with the easier options on this list and work your way toward the more detailed ones as you get more comfortable.
Don’t lose this list: 27 Best Protective Styles for Afro Hair
26. Twist Out
Install two strand twists all over your damp, well moisturized hair, let them dry completely overnight, then unravel each twist carefully the next morning for a defined, voluminous curl pattern.
The twist out is one of the most popular beginner styles because it uses a simple technique but produces a very beautiful, defined result that looks far more complex than what it actually took to achieve.
Start with larger twists if you’re new to the style since they’re easier to install and still give a gorgeous full result when unraveled.
The key to a great twist out is patience, don’t unravel your twists until they are one hundred percent dry or the definition will fall out within hours.
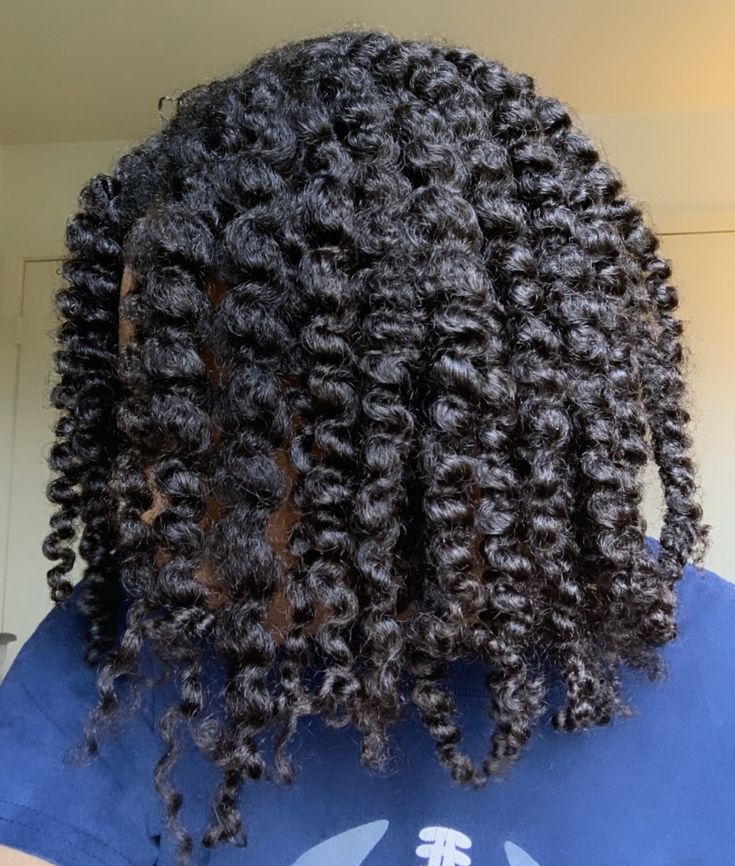
27. Flat Twist Out
Create flat twists along your scalp going in your preferred direction on damp hair, let them dry overnight, then carefully unravel each one for a flatter, more elongated wave pattern than a regular twist out gives.
Flat twist outs show more length than regular twist outs because the flat twisting technique stretches the hair more evenly from root to tip as it dries.
This is a great beginner style because even imperfect flat twists give a beautiful result when unraveled, so the pressure to get the technique perfectly right from the start is much lower than with other styles.
Apply a curl defining cream or butter to each section before flat twisting to get the most definition out of your natural curl pattern once unraveled.
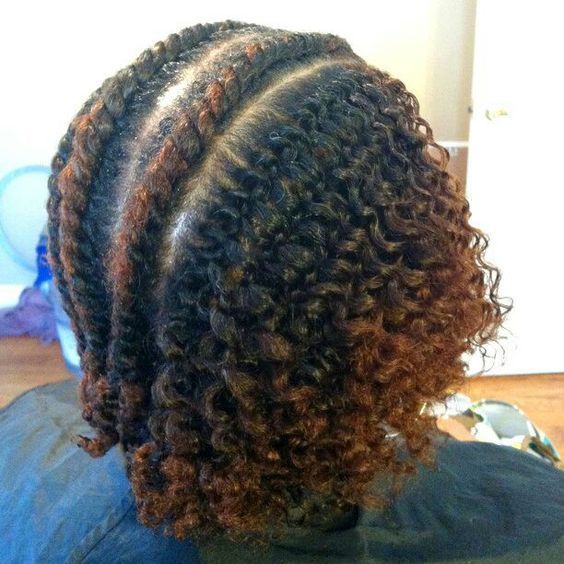
28. African Threading
Divide your hair into sections and wrap a thin thread tightly around each section from root to tip, then leave it in overnight to stretch your hair without any heat.
African threading is a traditional technique that has been used across Africa for generations to stretch and elongate natural hair without heat damage.
It works especially well on 4C hair types that experience extreme shrinkage and want to show more length without blowing out or flat ironing their hair.
In the morning you simply unwind the thread from each section and enjoy beautifully stretched hair that you can style in a puff, bun, or simply leave loose and elongated.
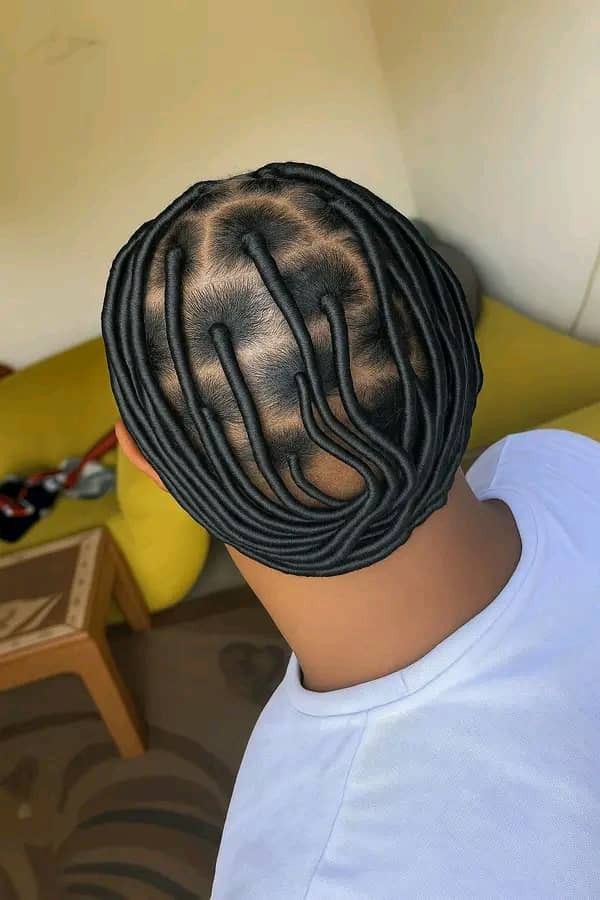
29. Banding Method
Divide your hair into sections and wrap a series of soft hair ties down each section from root to tip at regular intervals to stretch the hair without heat as it dries or overnight.
The banding method is even simpler than African threading and uses materials most people already have at home, making it a very beginner accessible stretching technique.
It reduces shrinkage significantly and gives a stretched result that makes pick outs, puffs, and braid outs look much fuller and longer than they would on unshrunk hair.
Always use soft satin covered hair ties for banding to avoid leaving dents in your hair or causing breakage where the ties sit.
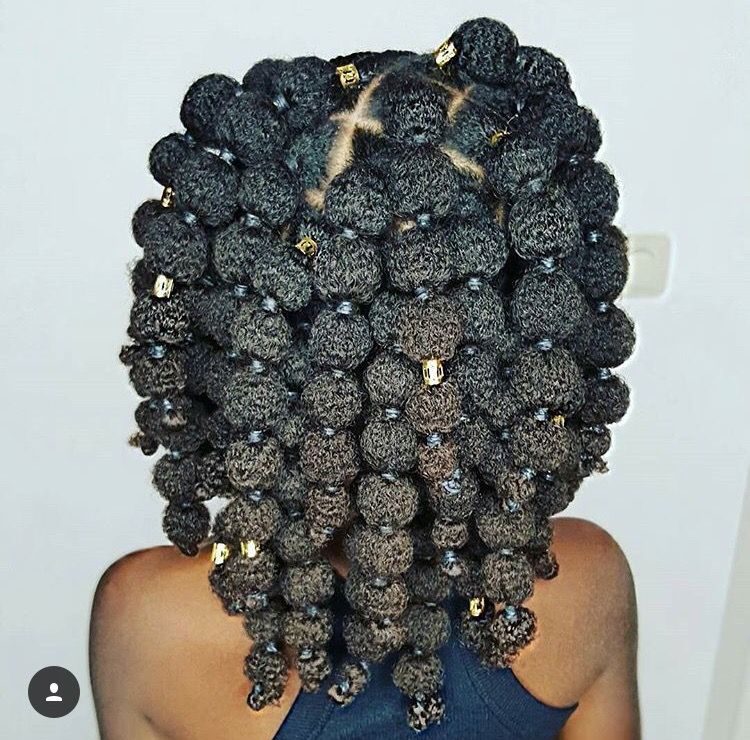
30. Finger Coils
Apply a generous amount of curl defining gel or cream to a small section of damp hair, then wrap the section tightly around one finger from root to tip and slide your finger out carefully to leave a defined, spring like coil in place.
Repeat this across your whole head section by section until every part of your hair is coiled, then allow everything to dry completely without touching before gently separating any coils that are stuck together.
Finger coils celebrate your natural curl pattern and give a very defined, uniform look that is especially stunning on shorter Afro hair where the coils have less length pulling them down.
This style takes patience and time but the result is one of the most beautiful and defined natural styles a beginner can achieve without any heat at all.
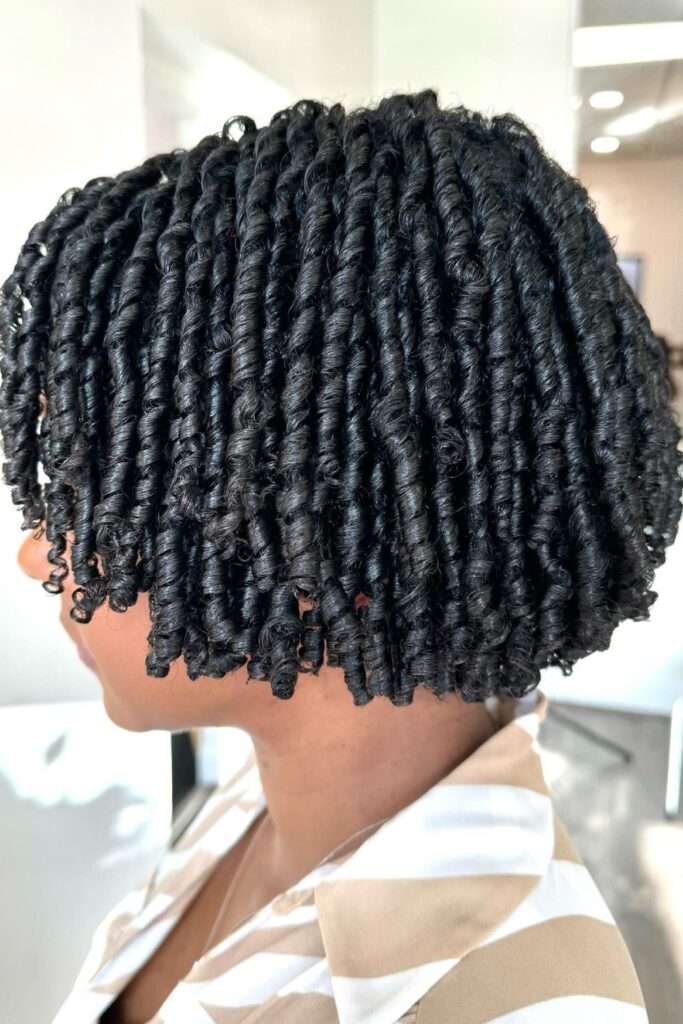
Accessorized and Everyday Styles
These styles use simple accessories or everyday techniques to create something that looks more polished than the effort required.
Accessories are one of the most powerful tools a beginner has because they can transform even the most basic style into something that looks deliberate and well put together.
Keep a small collection of headbands, scarves, clips, and hair ties in different colors and prints so you always have something to reach for when you want to elevate a simple style quickly.
None of the styles in this section require any special skill, just basic knowledge of your hair and a willingness to experiment.
See what everyone’s talking about: 75 Beautiful Afro Hairstyles You’ll Want to Save
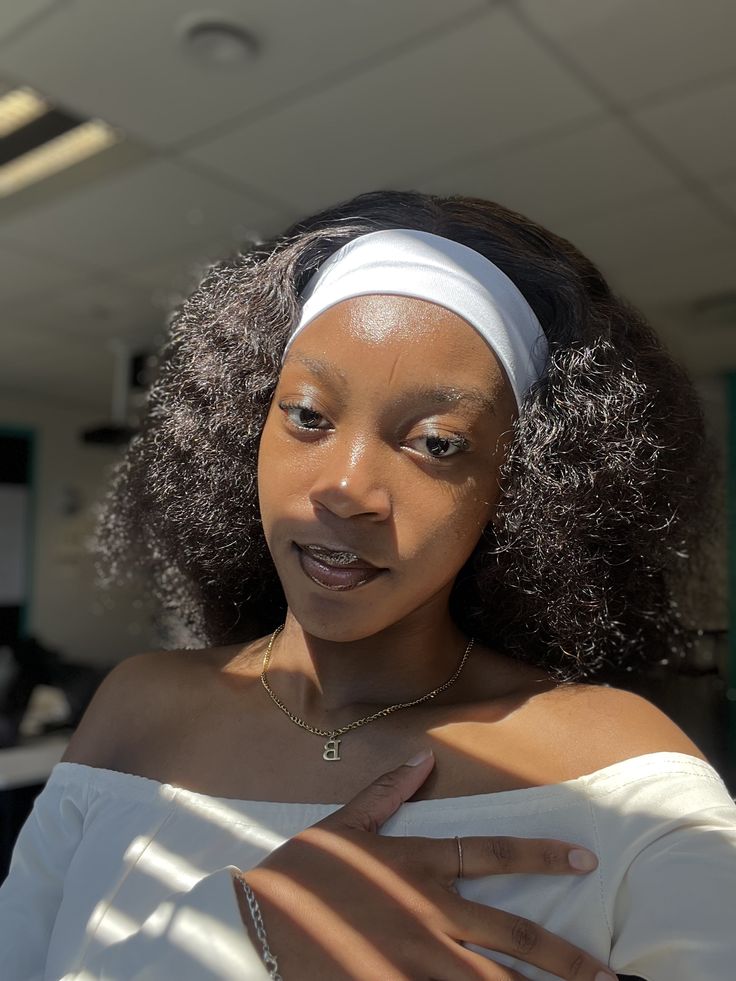
31. Headband Style
Push all your hair back away from your face using a wide headband and let your natural volume and curl pattern sit freely and visibly behind it.
This is arguably the simplest style on this entire list and takes about thirty seconds to achieve, making it perfect for absolute beginners or very rushed mornings.
Choose a wide headband that is satin lined on the inside to protect your edges from the friction and tension that regular fabric or plastic headbands can cause over time.
Swap the headband color or print depending on your outfit to make this simple style feel intentional and coordinated without any extra effort at all.
save this for later: The Complete Wash Day Routine for Afro Hair.
32. Scarf Wrap
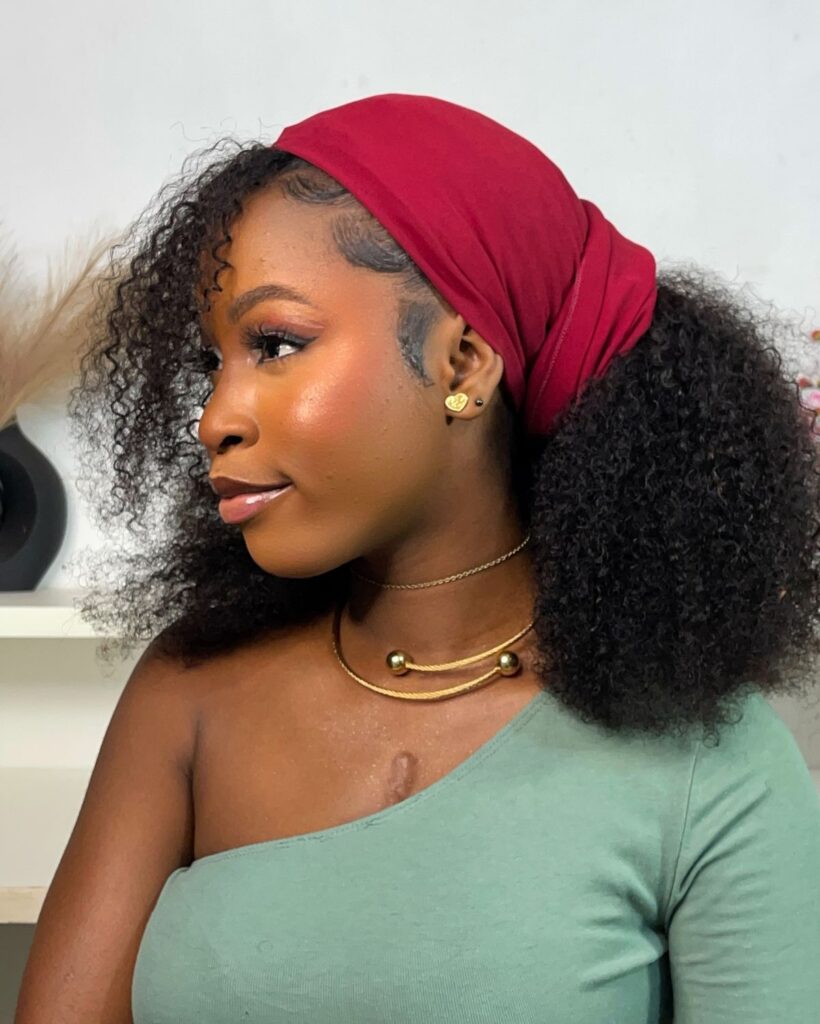
Take a long colorful scarf and wrap it around your hair in your preferred way, whether as a simple headband pushed back, a full turban style wrap, or tied loosely at the front with the ends hanging down.
Scarf wraps are incredibly versatile and forgiving for beginners because there is no wrong way to tie a scarf and even a loosely tied one looks stylish and intentional on natural Afro hair.
A silk or satin scarf also doubles as a protective tool because it reduces friction on your hair and edges as you move throughout the day.
This is one of the best beginner styles for protecting your hair on days when it’s not cooperating or you simply don’t have time to style it properly.
33. Afro With Headband
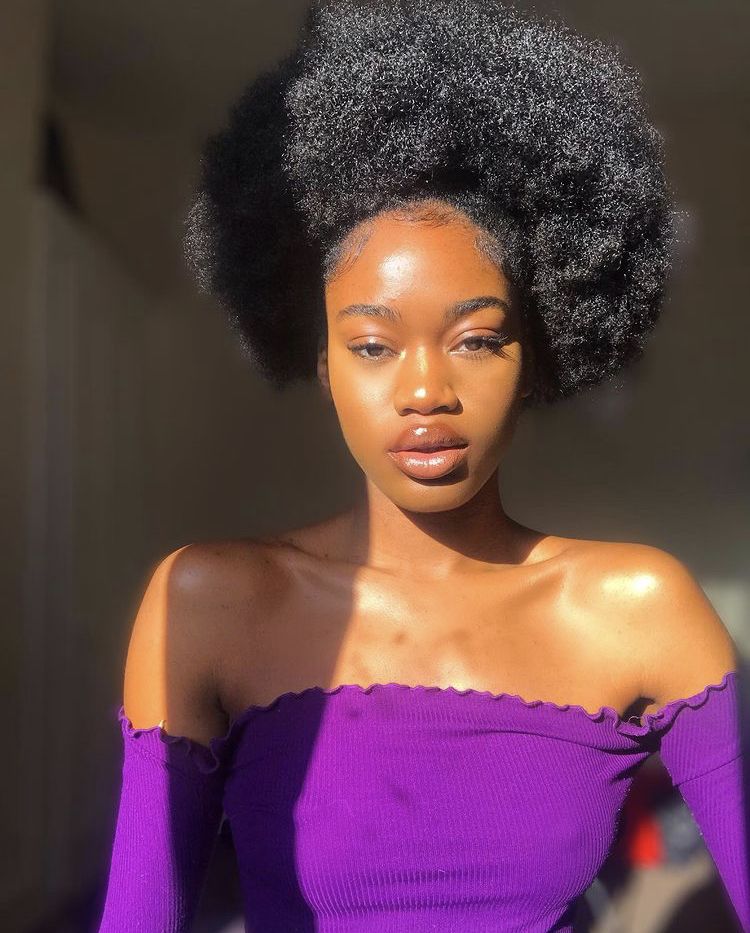
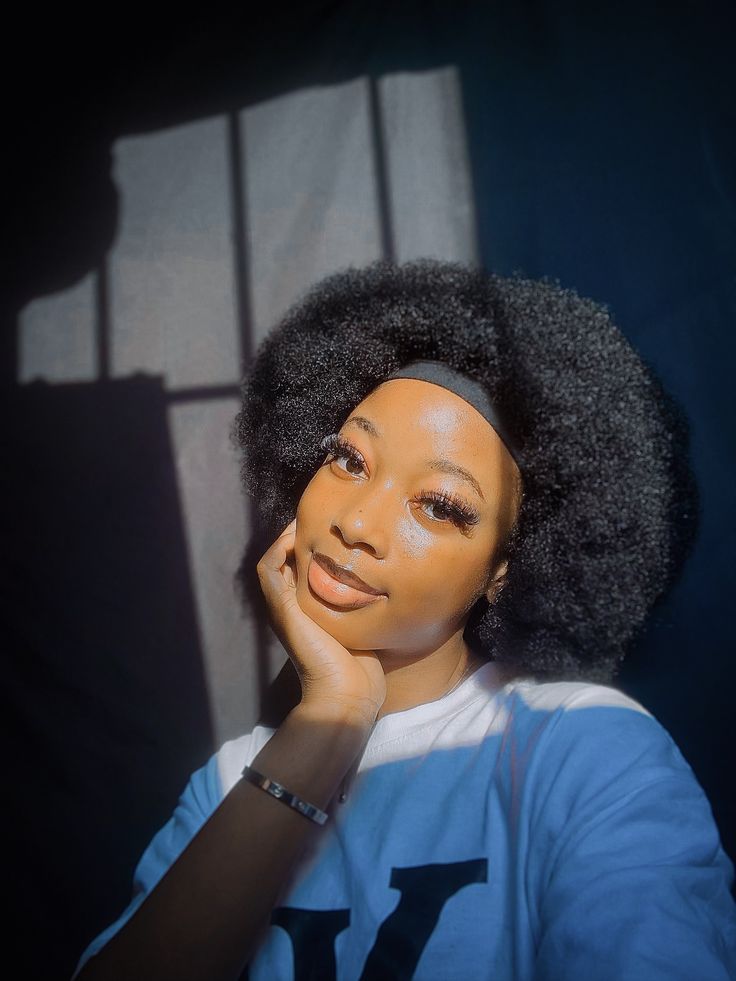
Pick your hair out fully into your natural Afro shape and then push a wide headband across the front of your hair to frame your face and add a finishing touch to the look.
This combines two of the simplest things you can do with Afro hair into one style that looks polished and well thought out without any extra technique or products beyond a moisturizer and a pick.
The headband adds structure to an otherwise free style and makes it look like you made a deliberate styling decision rather than just picking your hair out and leaving the house.
Satin lined headbands work best for this style to protect your edges and the front of your hair from the daily friction a regular headband causes.
Worth a look: 31 Quick Natural Hairstyles for Busy Mornings
34. Puff With Scarf
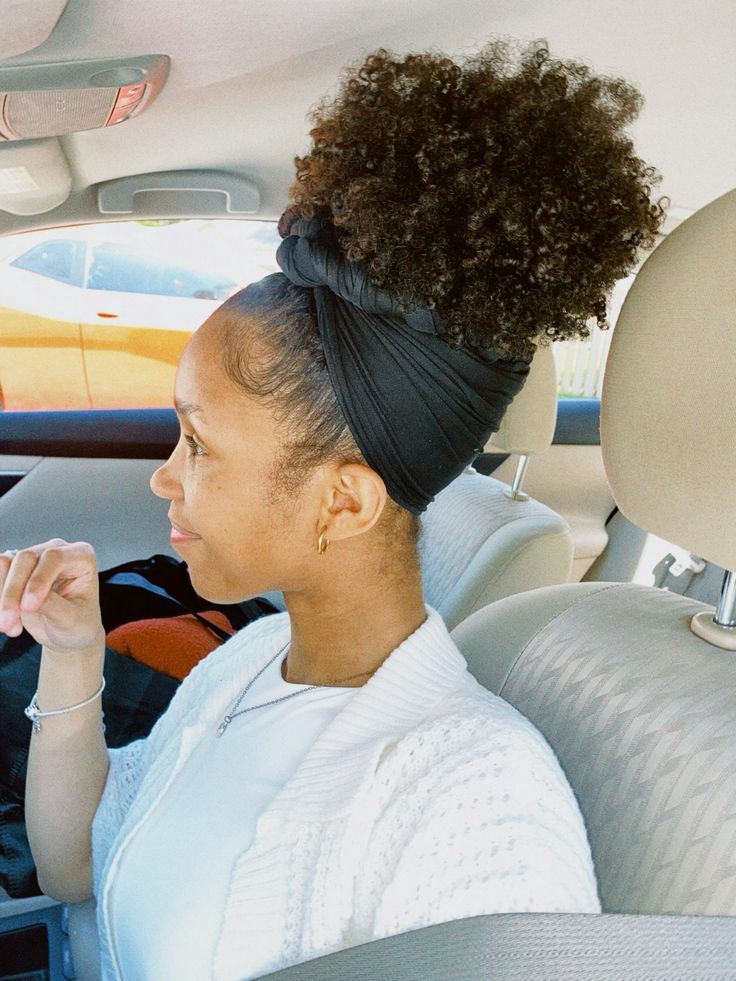
Create a high or low puff as usual and then tie a colorful scarf around the base of the puff, letting the ends hang loose or tucking them neatly underneath for a cleaner finish.
This is one of the easiest ways to add personality and color to a very basic style without learning any new techniques or spending any extra time on your hair.
The scarf can match or contrast your outfit depending on the look you want, and switching scarves is the fastest way to make the same basic puff look completely different from day to day.
This style works on all puff sizes from very small to very large and suits every hair length that can achieve a puff.
35. Defined Puff With Edges Laid
Create your regular high or low puff, then apply a small amount of edge control gel to your edges and smooth them down carefully using a soft edge brush or a clean toothbrush for a very clean, polished finish.
Laying your edges is one of the quickest ways to elevate any basic puff style from casual to intentional without changing anything else about the look.
Beginners sometimes skip edge control because they feel it’s an extra step, but it genuinely changes how finished and put together a style looks in under two minutes.
Use a light hold edge gel rather than a heavy one to avoid buildup and flaking along your hairline throughout the day.
Don’t be the last to see this: How Often Should You Wash Afro Hair?
A Few Final Things Worth Knowing
As a beginner, the most important thing you can take away from this list is that simple styles done consistently on healthy, well moisturized hair always look better than complex styles done on dry, neglected hair.
Your styling will improve as your hair gets healthier and as your hands get more practice, so don’t measure your beginner results against someone who has been on their natural hair journey for three or four years.
Focus on building a solid care routine first and let the styles follow naturally. The better you care for your hair, the easier every style on this list will become and the better the results will look over time.
Master five or six styles from this list before adding more, and practice those until they feel easy and natural before moving on.